Hey there! I'm excited you're starting with FTPie. Here's a quick guide to get you up and running in no time. Let's dive right in!
1. Download and Install FTPie
First things first, head over to our Download page and grab the app. Once it's downloaded, just double-click the installer-FTPie will take care of the rest.
There's no complicated setup; it installs smoothly and quickly. After a brief splash screen, you'll be all set to start using FTPie right away.
2. Adding FTP Storage
To add FTP storage, open the app and click the menu icon in the top left corner. Choose 'Add Storage' and select 'FTP'.
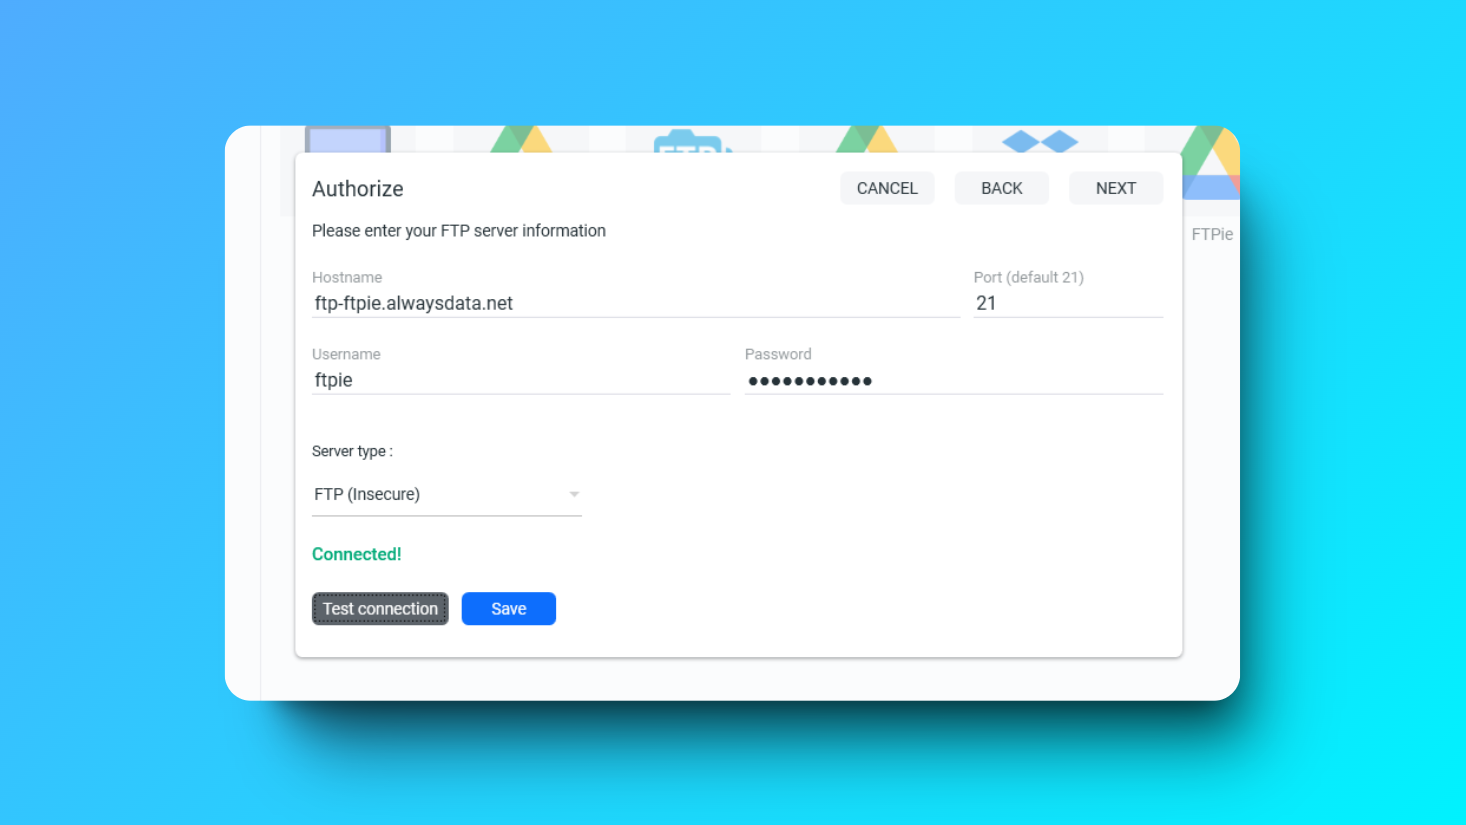
You'll need to enter your FTP server details, like hostname, username, and password. Click 'Test Connection' to check if it's working. If all's good, hit 'Save' and give your FTP storage a name.
3. Adding Cloud Storage
Adding cloud storage is just as simple. Go to the main menu and select 'Add Storage'. Pick the cloud provider you want-Dropbox, Google Drive, or OneDrive.
You'll be directed to your web browser to log in and authorize FTPie. Once logged in, you'll be brought back to FTPie. Enter a name for your cloud storage and hit 'Save'.
That's all there is to it! With these steps, you're ready to make the most out of FTPie. If you have any questions or need help, feel free to reach out.
To get more out of FTPie right away, explore the top 7 benefits of using FTPie or learn how the Shell Extension lets you upload files without even opening the app.